How to create a FelCloud VPS? Open the FelCloud console, click “New”, choose a plan (Starter, Basic, Pro or Premium) and an operating system, then select your authentication method. You can also enable backups if you want to restore your server later. Finally, review your configuration, choose a payment method and click “Place order”.
This guide follows the real console workflow: creation, backups, payment, monitoring, resizing and system volume adjustment.
1. How to create a Felcloud VPS: Choose a Plan and OS
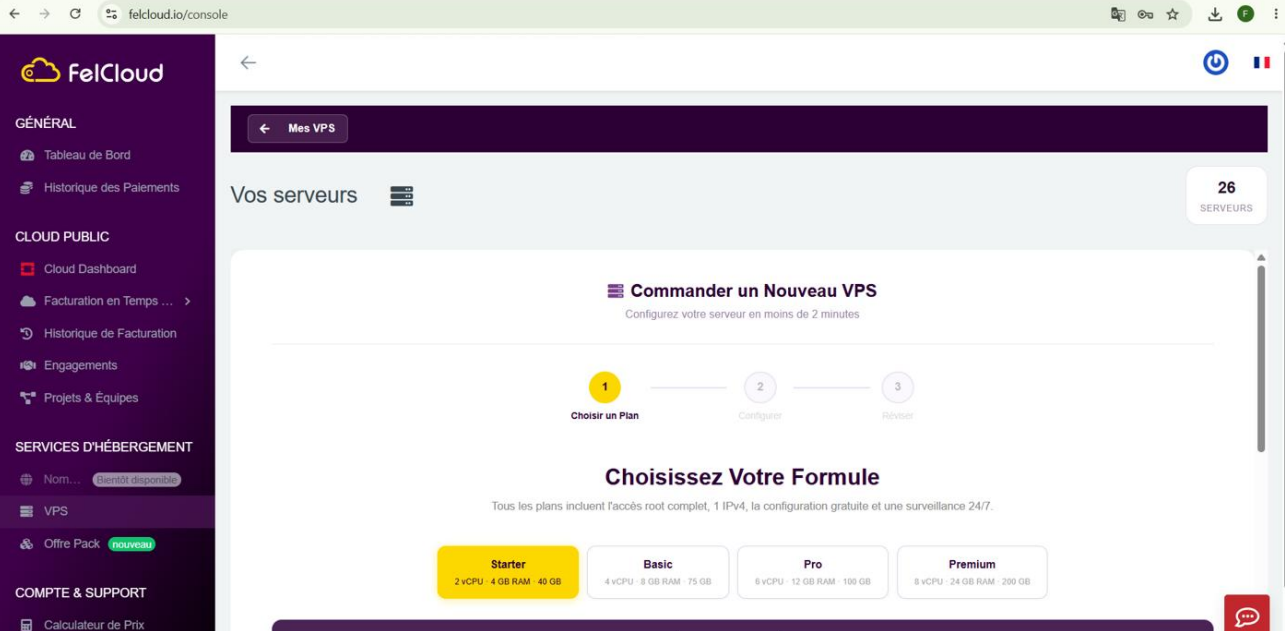
In the left menu, open Hosting Services → VPS, then click the “New” button. The order wizard has three steps: Choose a Plan, Configure, Review.
Here are the monthly prices for a 1-month term:
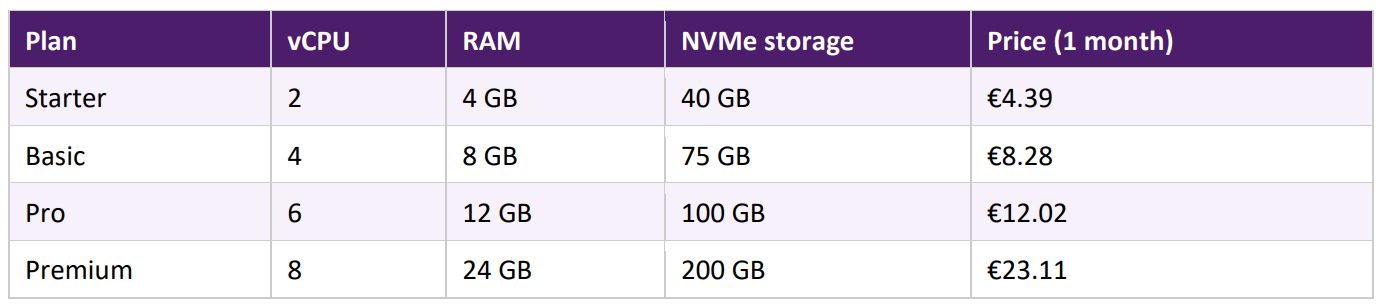
A 6-month term saves 5% and a 12-month term saves 15%. You can ee details on our VPS pricing page :
At the “Configure” step, pick your operating system (for example Ubuntu 24.04 LTS Noble Numbat) and your authentication method : ssh or password.
2. Enable backup and restore your VPS
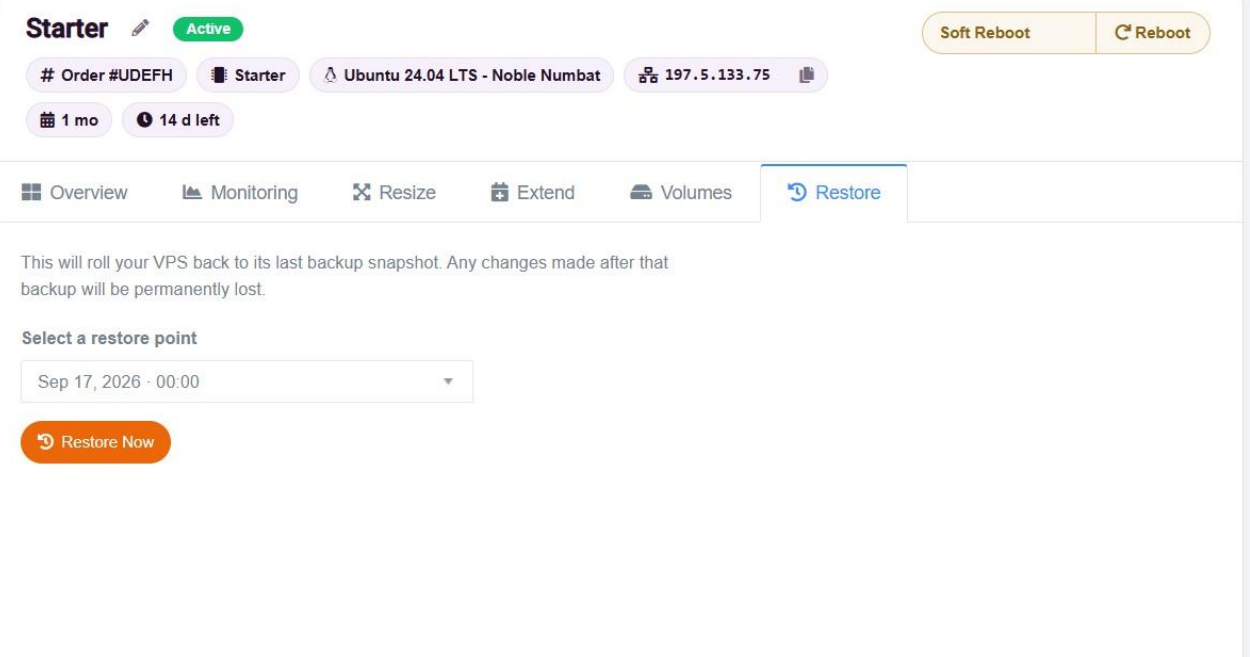
Still at the “Configure” step, click Backup if you want to make backups and restore your VPS later. Once the server exists, you will always find the 3 latest backups of your VPS. To go back to an earlier state, open your server’s Restore tab, select a restore point from the list, then click "Restore Now"
 3. Place the order and choose a payment method
At the “Review” step, check the summary: plan, operating system, system volume and authentication. You can also click “Add a server” to order up to 5 servers at once. Nothing is charged until you confirm.
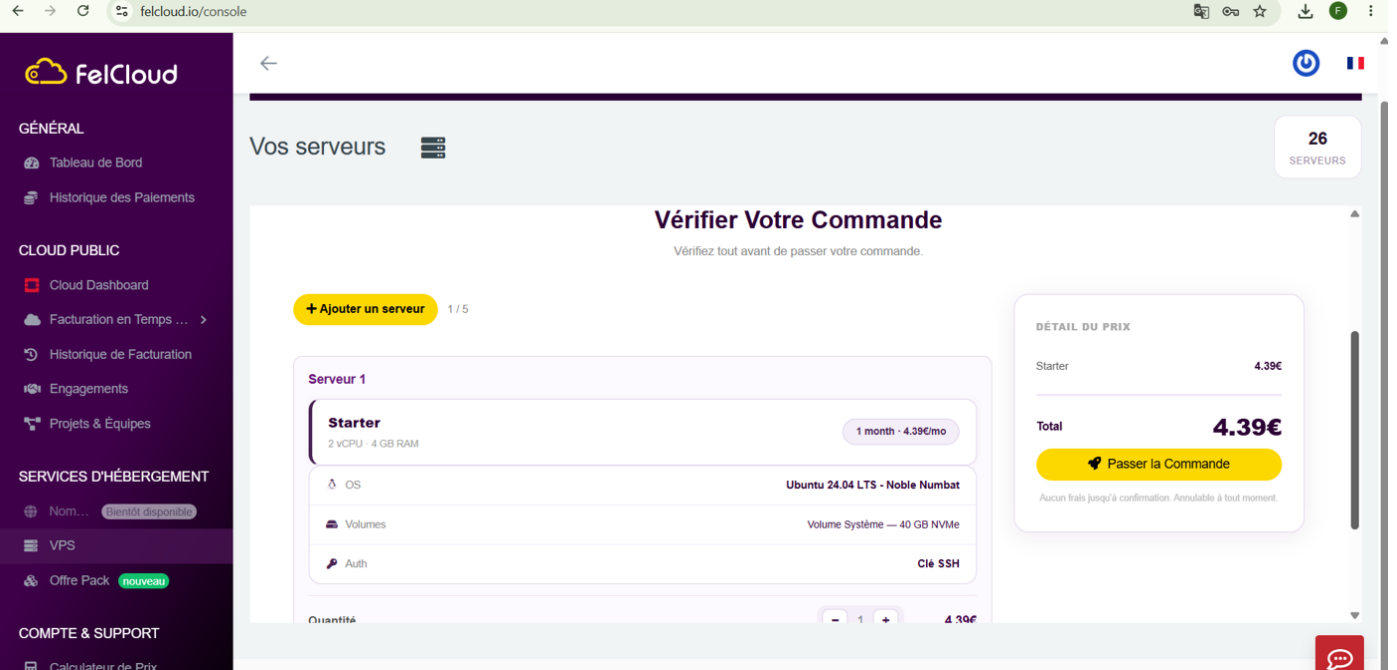
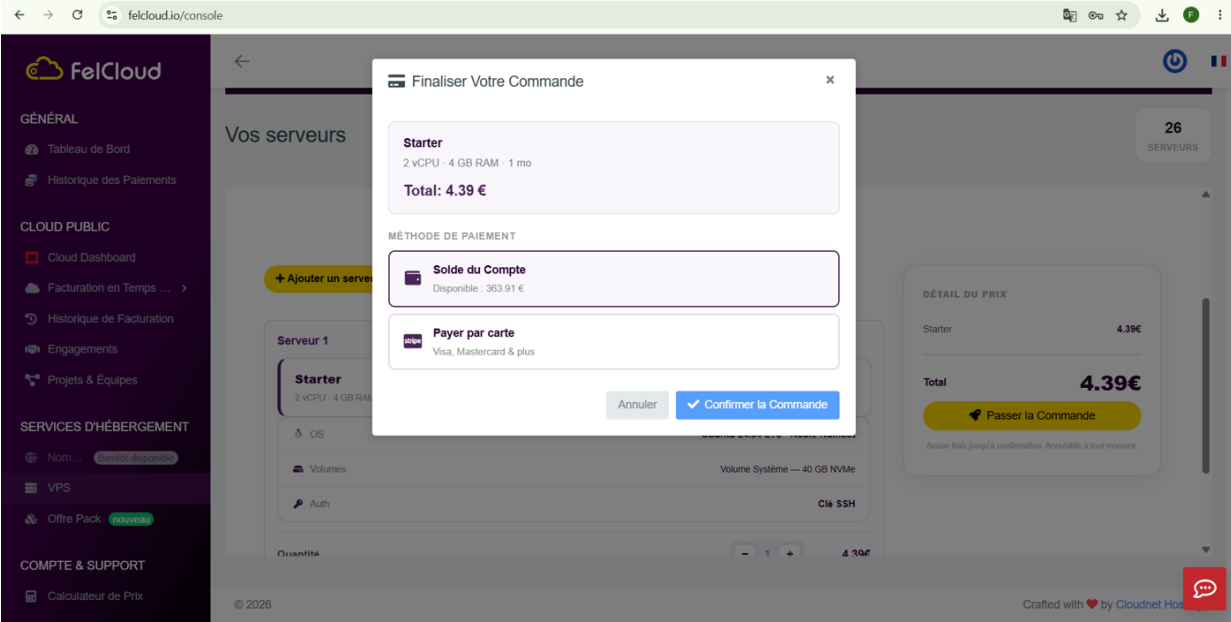
Then click “Place order”. A “Finalize Your Order” window asks you to choose the payment type:
• Account balance: the amount is deducted from your FelCloud balance (your available balance is shown).
• Pay by card: secure payment with Visa, Mastercard and more through Stripe. Select your method, then click “Confirm order”.
4. Monitor your VPS in real time
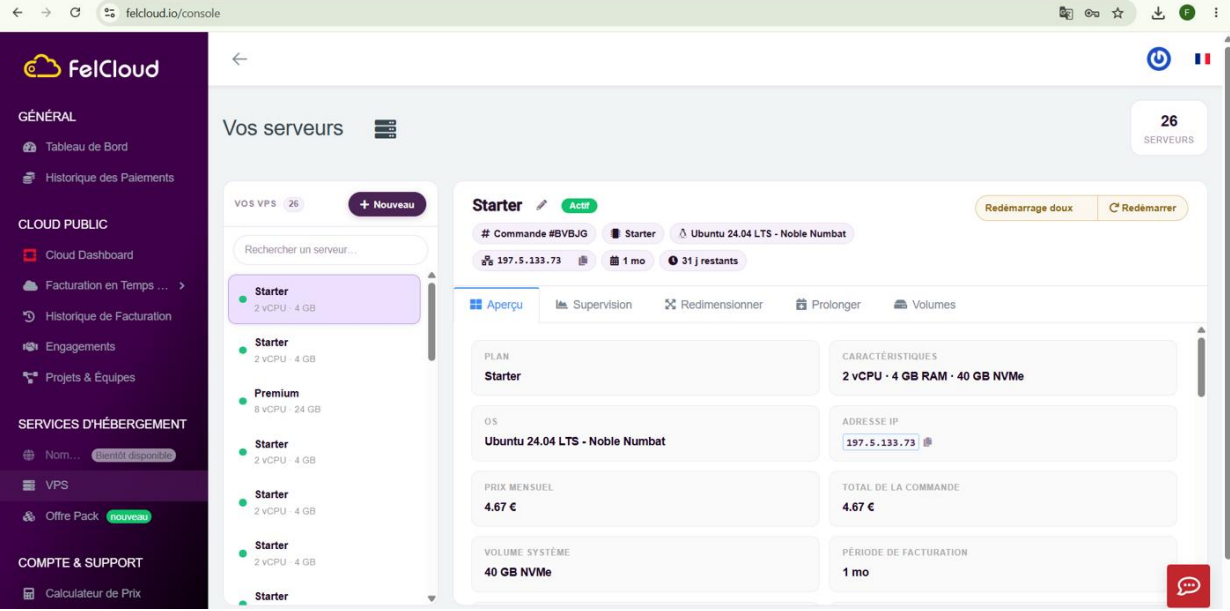
Once the server is active, the Monitoring tab shows CPU, memory, network, disk I/O, latency and disk size. Metrics are collected directly from the hypervisor: no agent runs inside your server.
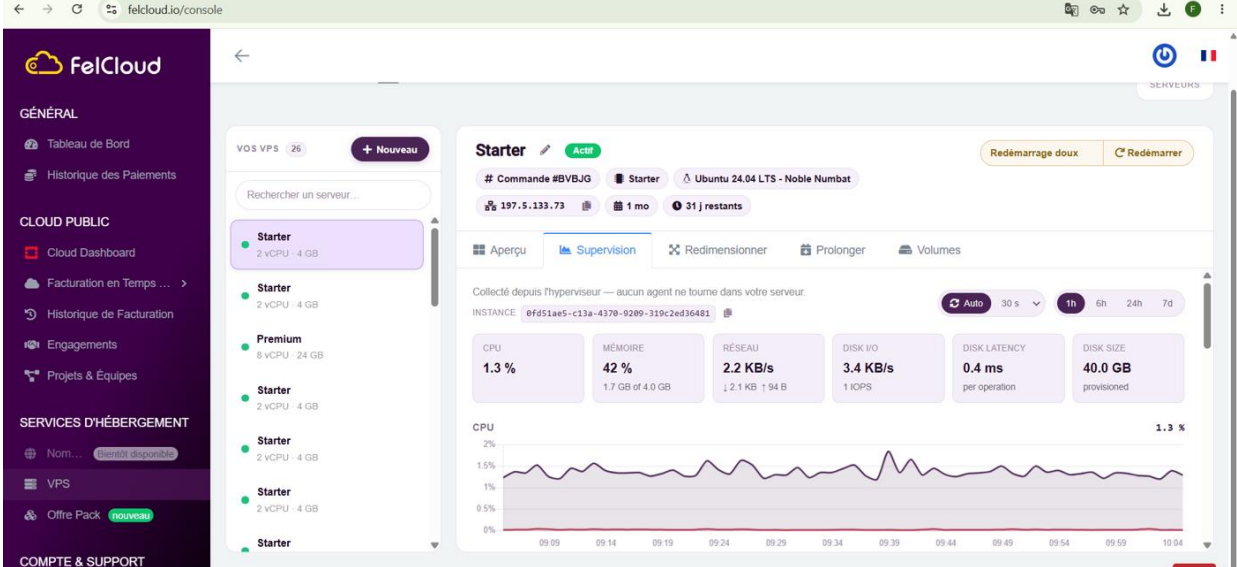
Pick the time range (1h, 6h, 24h or 7d) and the auto-refresh interval. It is the first thing to check when you wonder whether your VPS is running out of resources.
5. Resize your VPS
When your plan gets too tight, open the Resize tab and pick a new plan. The upgrade applies immediately and requires a short reboot. The prorated amount for the current day and the days remaining are displayed before you confirm.
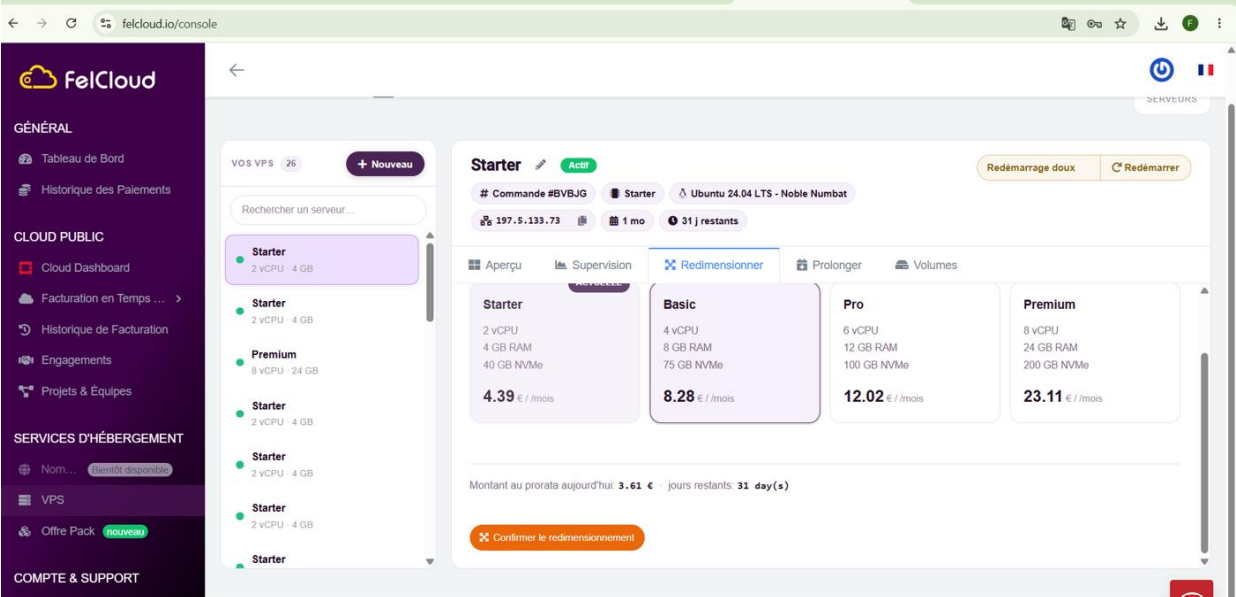
Click “Confirm resize” once the new plan is selected.
6. Adjust the system volume size
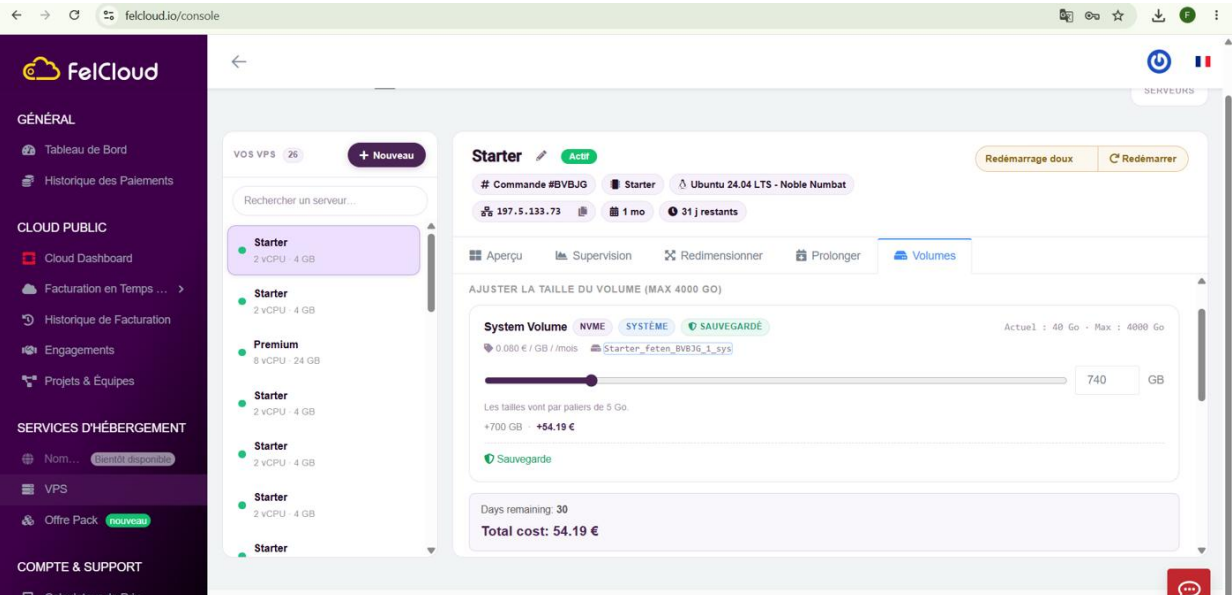
The Volumes tab lets you grow the system volume (NVMe, up to 4000 GB) with a slider, in steps of 5 GB. The price per GB (€0.080 / GB / month) and the prorated total cost are shown before you confirm. The system volume is marked “Backed up”: it benefits from the automatic backups used by the restore feature.